Showing posts with label Therm O Web. Show all posts

Saturday, May 10, 2014

Sunglasses Zipper Pouch Tutorial

Today I am sharing my tutorial for a zippered sunglasses case over on the Therm O Web Blog.  What is great about this zipper pouch is the lining is made of flannel so it is soft on the lenses.  I love this fabric - it's the "blue" version of the Clementine fabric by Blend.  It screams summer to me.


Here you can see the gray flannel inside the pouch:
 For the zipper pull, I took apart some owl earrings and used a split ring to attach the owl to the zipper pull.  I always am on the look-out for cheap dangly earrings!


It's not too late to sew up one of these in time for Mother's Day.  It should only take about 30 minutes!

For a slightly different version…...
 cut a 1" square notch out of each corner of the bag when it's in this stage:
Open the notches, and match the seams, sewing a 1/4" seam.  This gives the bag a "bottom" and allows the pouch to stand up.  I can't decide which one I like the best!   


Amanda

Monday, May 5, 2014

Fabric Key Chain Tutorial

Everyday this week I will be featuring a Mother's Day Gift sewing tutorial!!
I like to give my "Mom Friends" a little give on Mother's Day.  I have seen these fabric keychains, or "Key Fobs"  all over blogland and I finally decided it was my turn to have a go at them.  They are a perfect little gift!  These yummy fabrics are Modern Eclectic by Khristian Howell for Blend Fabrics.


Supplies
Cotton belting or webbing - I purchased mine from the Etsy Shop, Everything Ribbons
Key Fob hardware - purchased from the same Etsy Shop
2" strips of fabric
Therm o Web Heat n Bond Hem Tape
Cardstock
Fray Check
Pliers

Cut the fabric into 2" x 10" strips
Cut the cotton webbing 10"


Cut a piece of card stock 1" wide.  This will be the pressing guide.  Center the card stock strip in the center of the wrong side of the fabric.  Press the sides in using the card stock to keep the folds nice and straight.


Using the hem tape, place a 10" piece in the center of the webbing.

Place the pressed fabric piece on top of the fusible hem tape like this:
Press in place

Top stitch the fabric along both sides.  I like to use this Bernina foot #5 and move my needle over 3 or 4 spaces.  It works like a charm!


I took one of those sticky discs that you put on the bottom of chairs and cut it in half and adhered it to my pliers - this will prevent scratching on the hardware.  Fold the Keychain in half matching raw ends. Center the hardware and use the pliers to press in place.


Use the fray check on the sides to prevent fraying.


I think they are so cute!!  And also handy!!

Amanda

Tuesday, April 22, 2014

Riley Blake Union Jack Quilt Tutorial


Cheers!  I am so excited to be participating in Riley Blake's Union Jack Blog Hop!  I am in love with the fun colors of this Union Jack panel!  My friend, Karen, loves all things British: Jane Austen, Charlotte Bronte, the Royal Family, Sticky Toffee Pudding, Fish 'n Chips, Beef Wellington, The Cure & Adele….her husband served a mission in England, AND here is Harper, their adorable baby girl with a trendy British name!  Harper is the cutest baby ever and this quilt is for her.  


This quilt is the perfect size for a wallhanging or baby quilt
Finished quilt 38.5" x 30.5"

Here's how you can make your own "Harper Girl" quilt.
Supplies:
1 Union Jack print
assorted jelly roll strips of prints and white - or yardage to cut strips
Heat n Bond Lite Printable sheets
batting
1 yard backing fabric
1/3 yard binding


Cut the white fabric and assorted prints into 2.5" strips x WOF
I used 1 strip of each of the 8 colors, cut 16 white strips
Now cut each WOF strip in half

Sew into strip sets of (5) total.  I just picked random colors and didn't try and lay out the pattern.  Make 3 sets with white beginning and ending and 3 sets with prints beginning and ending as pictured:
Press toward the prints.

Cut the strip sets into 2.5" sub sets:

Make 2 piles: one with the white on the outside and one with the patterned fabric on the outside:

Now comes the fun part - grab and sew!  Once again, I didn't try and lay out a pattern, I just grabbed 2 strip sets and sewed together.  Make sure the intersections of the seams sandwich together nicely.


Make 9 of these blocks: 5 blocks with patterned corners, 4 blocks with white corners.

Fussy cut one of the Union Jack blocks, leaving a 1/4" seam allowance around the print.


Find a font you like and print it in reverse on one of these Heat n Bond EZ print sheets - you could also use a silhouette, but I am not that advanced!  


 Cut out the letters and peel off the backing paper.  Cut a piece of white fabric 9.25" wide (the width of the Union Jack) x 19.5"   Place the letters and iron in place.  Straight stitch around each letter twice.  

Sew the Union Jack to the white fabric.

Lay out your blocks in this pattern: 2 rows of 3 blocks, then the Union Jack strip, then 1 row of 3 blocks.  Square up the white fabric if there is a little excess on the end.


Quilt as desired


Amanda

Thursday, April 3, 2014

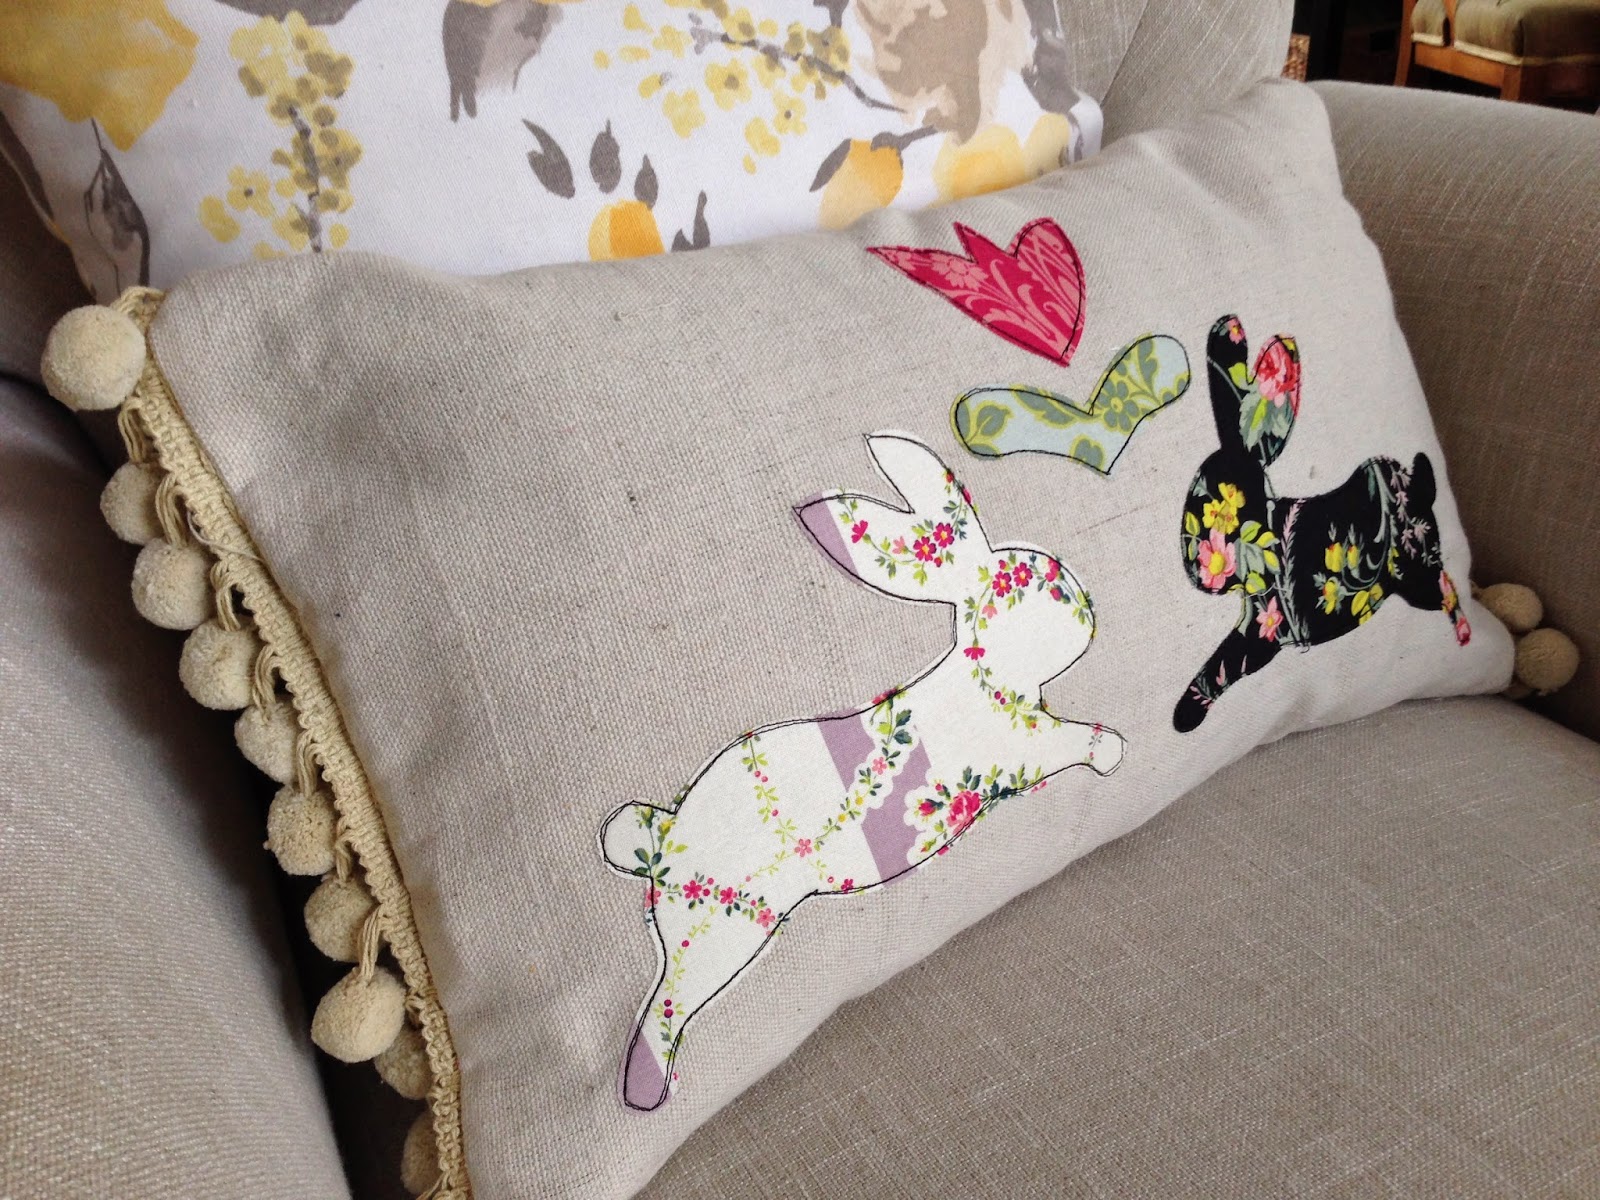
Bunny Love Pillow


I guess there is no stopping the bunny projects!  Meet my newest bunny creation - Bunny Love pillow! This is a fast and easy project that will add a Folk Art Easter feel to your home.

Supplies:
Backing fabric, 3/4 yard
Scraps of fabric for appliqué - I used Anna Griffin's Grace line
Pom Pom trim
22" zipper
Pillow form or fiber fill
Heat n Bond lite

Begin by cutting the pillow front 20" x 12"
Iron the Heat n Bond lite to the back of your appliqué fabric.  I used the Sizzix bunny die for the bunnies.  The folk art tulip pattern can be downloaded here.


Once you have cut out your appliqué pieces, center them on the pillow front.  Iron to set in place and stitch around each piece twice with black thread.


Cut the pom poms the width of the pillow and baste them into place.

For the pillow back…..
There are a few options to finish the pillow:
1.  You can cut the back piece the same size as the front, sew it, turn it, stuff with fiber fill and hand stitch the opening closed.
2.  I used a pillow form and put an invisible zipper in the bottom portion of the back.  I cut 2 pieces for the back:  20" x 2" and 20" x 2.  Set the invisible zipper joining the two pieces.  For invisible zipper tutorial, click HERE.  

Pin the back to the front with right sides together, making sure zipper is open.  My back was a touch larger then the front, so I just trimmed off the excess.  Make sure to tuck those pom pons in so they don't get caught in the seam.

Sew all the way around the pillow using 1/2" seam.  Turn and insert pillow form.


OK, now this is my favorite thing in my house :)


Amanda