Showing posts with label Heat n Bond. Show all posts

Thursday, April 3, 2014

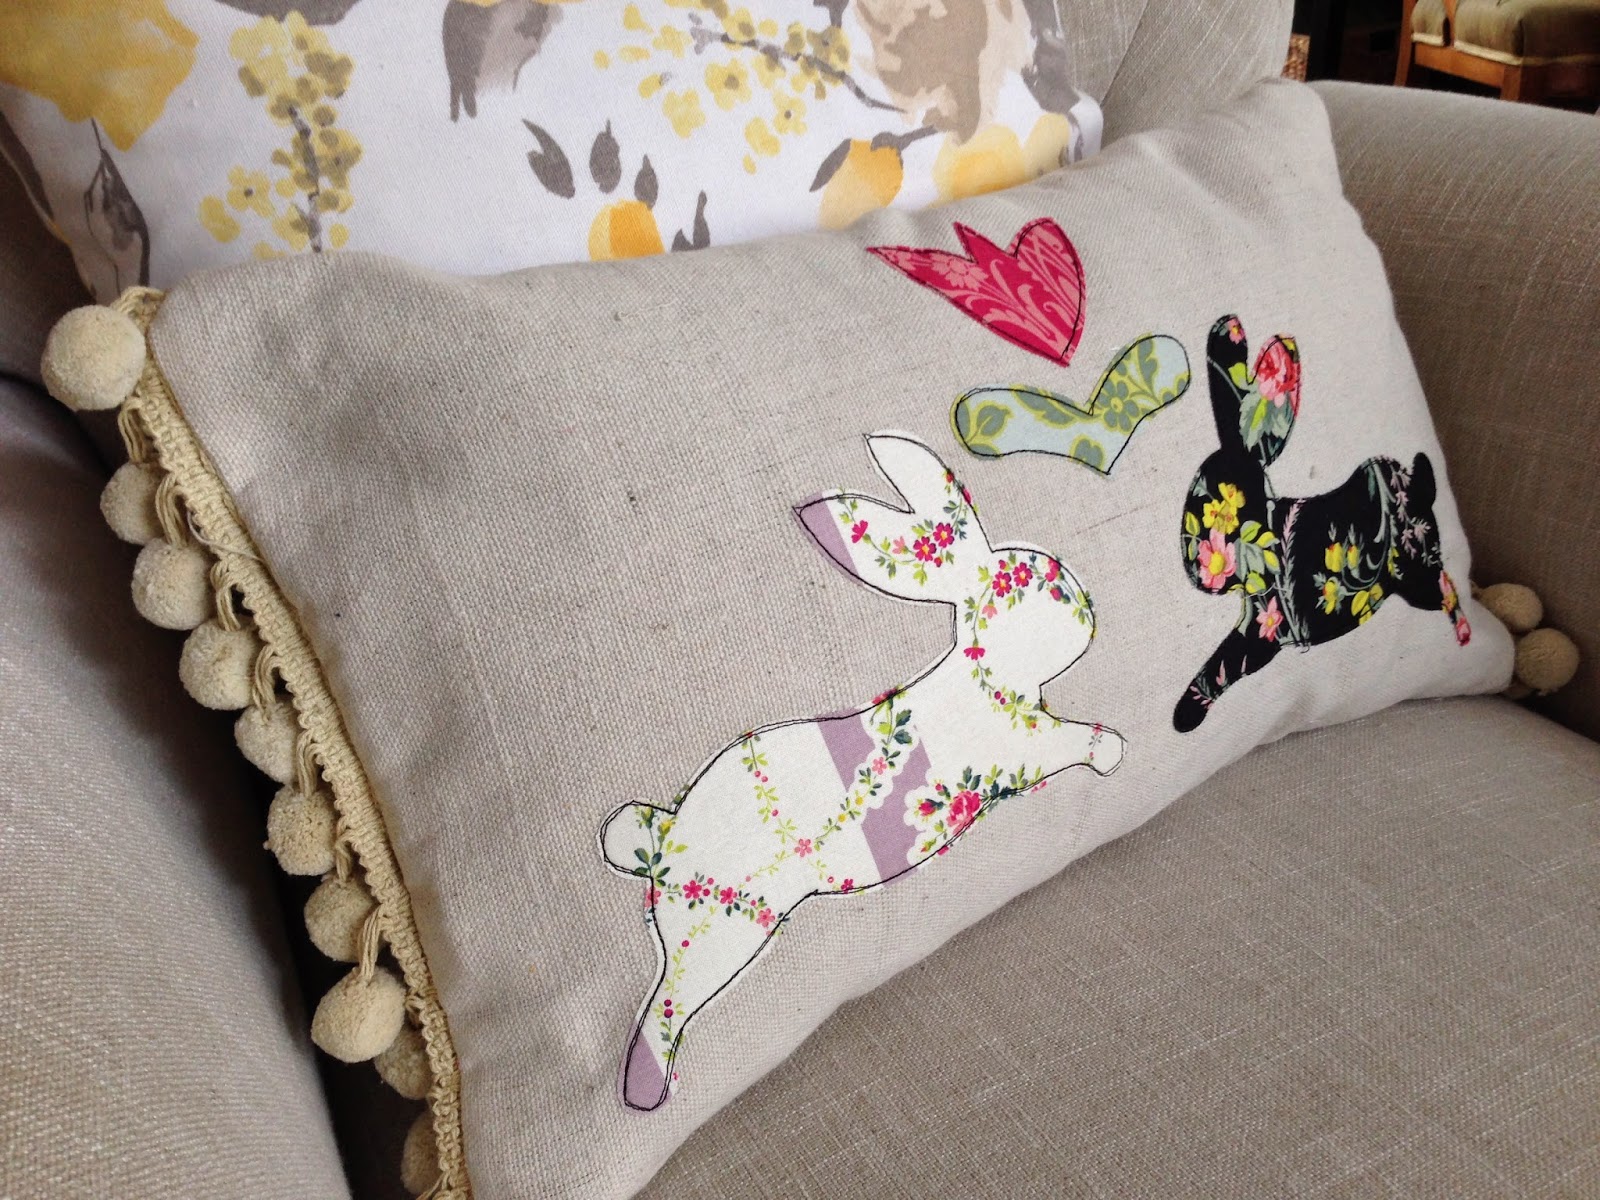
Bunny Love Pillow


I guess there is no stopping the bunny projects!  Meet my newest bunny creation - Bunny Love pillow! This is a fast and easy project that will add a Folk Art Easter feel to your home.

Supplies:
Backing fabric, 3/4 yard
Scraps of fabric for appliqué - I used Anna Griffin's Grace line
Pom Pom trim
22" zipper
Pillow form or fiber fill
Heat n Bond lite

Begin by cutting the pillow front 20" x 12"
Iron the Heat n Bond lite to the back of your appliqué fabric.  I used the Sizzix bunny die for the bunnies.  The folk art tulip pattern can be downloaded here.


Once you have cut out your appliqué pieces, center them on the pillow front.  Iron to set in place and stitch around each piece twice with black thread.


Cut the pom poms the width of the pillow and baste them into place.

For the pillow back…..
There are a few options to finish the pillow:
1.  You can cut the back piece the same size as the front, sew it, turn it, stuff with fiber fill and hand stitch the opening closed.
2.  I used a pillow form and put an invisible zipper in the bottom portion of the back.  I cut 2 pieces for the back:  20" x 2" and 20" x 2.  Set the invisible zipper joining the two pieces.  For invisible zipper tutorial, click HERE.  

Pin the back to the front with right sides together, making sure zipper is open.  My back was a touch larger then the front, so I just trimmed off the excess.  Make sure to tuck those pom pons in so they don't get caught in the seam.

Sew all the way around the pillow using 1/2" seam.  Turn and insert pillow form.


OK, now this is my favorite thing in my house :)


Amanda

Friday, March 28, 2014

Vintage Bunny Skirt Tutorial

The bunnies keep multiplying!  I knew they would make a darling skirt (what's next, throw pillows & tote bags??) This is a simple tutorial for a girls skirt size 6/7 that sews up in no time!  The tutorial is being featured over at the Therm o Web blog.  Click HERE to check it out!!


Amanda

Thursday, March 27, 2014

Burlap Bunny Pillows


I can't get enough of these appliqué bunnies in the Anna Griffin Grace fabrics!!  I had some left over from my Bunny Bricks Quilt so I thought I would make a few burlap pillows for gifts.  They are so cute and sew up really fast.  


Here's how you can make one:
  • Cut 2 pieces of burlap 8" x 11"
  • I already had the Heat n Bond Lite fused to the bunny, so I just ironed it to the center of the burlap.
  • Stitch around the bunny twice using brown thread.
  • Pin the two pieces of burlap wrong sides together.  
  • Cut a 17" piece of lace and pin in place, tucking the raw edges inside the pillow.
  • Sew 1/2" seam around the pillow leaving an opening at the bottom to stuff.  Stuff with fiber-fill and top stitch the opening closed.


They are so cute, and did I mention I love bunnies?  They are the cats of Easter :)


Amanda

Friday, February 21, 2014

Baby Octopus Zipper Pouches

If you know me at all, you know I LOVE zipper pouches!  Since all the fabric is still out from my Octopus Tote Bag, I thought I would sew up a few pouches.  They sew up super fast.  I made 2 versions and I will explain them both below.


"My Favorite Zipper Pouch"  This is modified from my tutorial posted here.  Follow those instructions except for these changes:

Use the same measurements for the outer bag and the lining  (9'x 6.5")  This bag is canvas so omit the fusible fleece.

For the accent strip, cut (2) 3" x 9" and press edges to the center.  

I used basting spray to hold the folded edges in place.

Pin the accent strip 3.5" from the top and make sure it's straight.  Topstitch both sides of the accent strip onto the canvas pieces.  Do this on the front and back pieces.

Prepare the appliqué by tracing the octopus pattern HERE on Heat n Bond Lite.  Iron to the wrong side of the fabric.  Cut on the pattern line.


Position the octopus as placed above.  I like to use an open foot like this Bermina #20 when sewing around my images.  It lets me see the image better.  Sew around the octopus twice with a straight stitch.  I had some fabric with words on it and sewed the word strip on.


Once the bag front and back are finished, sew the bag together as in the tutorial here.  I added a swivel lobster clasp to the side.  Also, when notching the bottom corners, instead of a 1.5" square, use a 1.25" square.


Version 2 Rounded Zipper Pouch
This zipper pouch is super easy - there is no lining and no zipper tabs which means you can make it in about 15 minutes!  The weight of the canvas gives it enough strength.

Cut (2) rectangles from the canvas 5.5" x 7.5"
Using a bowl or plate, round the bottom two corners of the 2 rectangles.

Using basting spray, place one of the bag pieces to the wrong side of your fabric.  Spray in place.  Cut around the bag shape.  This is now your bag back.

Applique the octopus on the bag in the same manner as the first zipper pouch.
 

These are the two bag pieces.


Lay the zipper in between the bag pieces, right side up like this:

 Flip the zipper over and align with the top edge of the back piece.  Sew using a zipper foot.  Then sew the zipper to the bag front in the same manner.  Press and top stitch along zipper seam.

With the zipper pull in the center of the bag, trim off the excess zipper.  Place bag front and bag back right sides together.  Pin.  Sew using 1/4" seams.  Zig zag the edges so they won't fray.

Turn right side out and press.


Amanda

Wednesday, February 19, 2014

Octopus Tote Bag

 I am sooooo excited to share this tutorial with you!  It's on the Therm O Web blog today!!   I have been working like crazy to get it done!  We are ocean lovers at my house.  In fact the octopus is my daughter's favorite animal!  This tote bag is made with heavy canvas and accents of Blend quilting cottons.  The blue fabrics have the feel of water.   This project uses Therm O Web's  Spray n Bond, Fusible Fleece and Heat n Bond Lite.


The tentacles wrap around to the side/back of the bag.
 I love the back - it's cute even plain!


Coming soon, a coordinating zipper pouch!!!


Amanda