Showing posts with label Christmas. Show all posts

Wednesday, December 18, 2013

6th Annual Waffle Party


It's our 6th Annual Waffle Party!  We look forward to this every year!  It all got started when there was a misunderstanding about a friend's wassail party - waffle & wassail are very similar.  We love to set a fancy table and use all the good china and silver and eat a big breakfast for dinner!  We always invite the missionaries.


David cooked 3 packages of bacon and a Costco size package of sausage.

Ella and I made 3 batches of waffles.  Love the Pyrex!
 

We also have berries & whip cream, fruit salad, hash browns, and eggs made to order.  This dinner is messier to prepare than any Thanksgiving dinner!  But totally worth it!


Amanda

Tuesday, December 10, 2013

Deer Ornaments

I found this cute tutorial for deer ornaments over on the According to Kelly Blog. Its a guest post from Traci at Beneath my Heart.  Click Here for her tutorial.  She has great instructions on how to make them.  Super cute!

I made 18 of them to give to friends.  They were super fun!  My deer stamp is a little different, its from a Stampin' Up set.  I think my tinsel was slightly larger too.  A great glue gun project - I only burned myself 3 times!!


I kept one for myself to add to my woodland animal tree.  I LOVE this tree!  Nice hedgehog!

Raccoons, fox and owls….
 more birds & owls…

 I really love woodland animals!


Amanda

Sunday, December 8, 2013

St. Nicholas Day

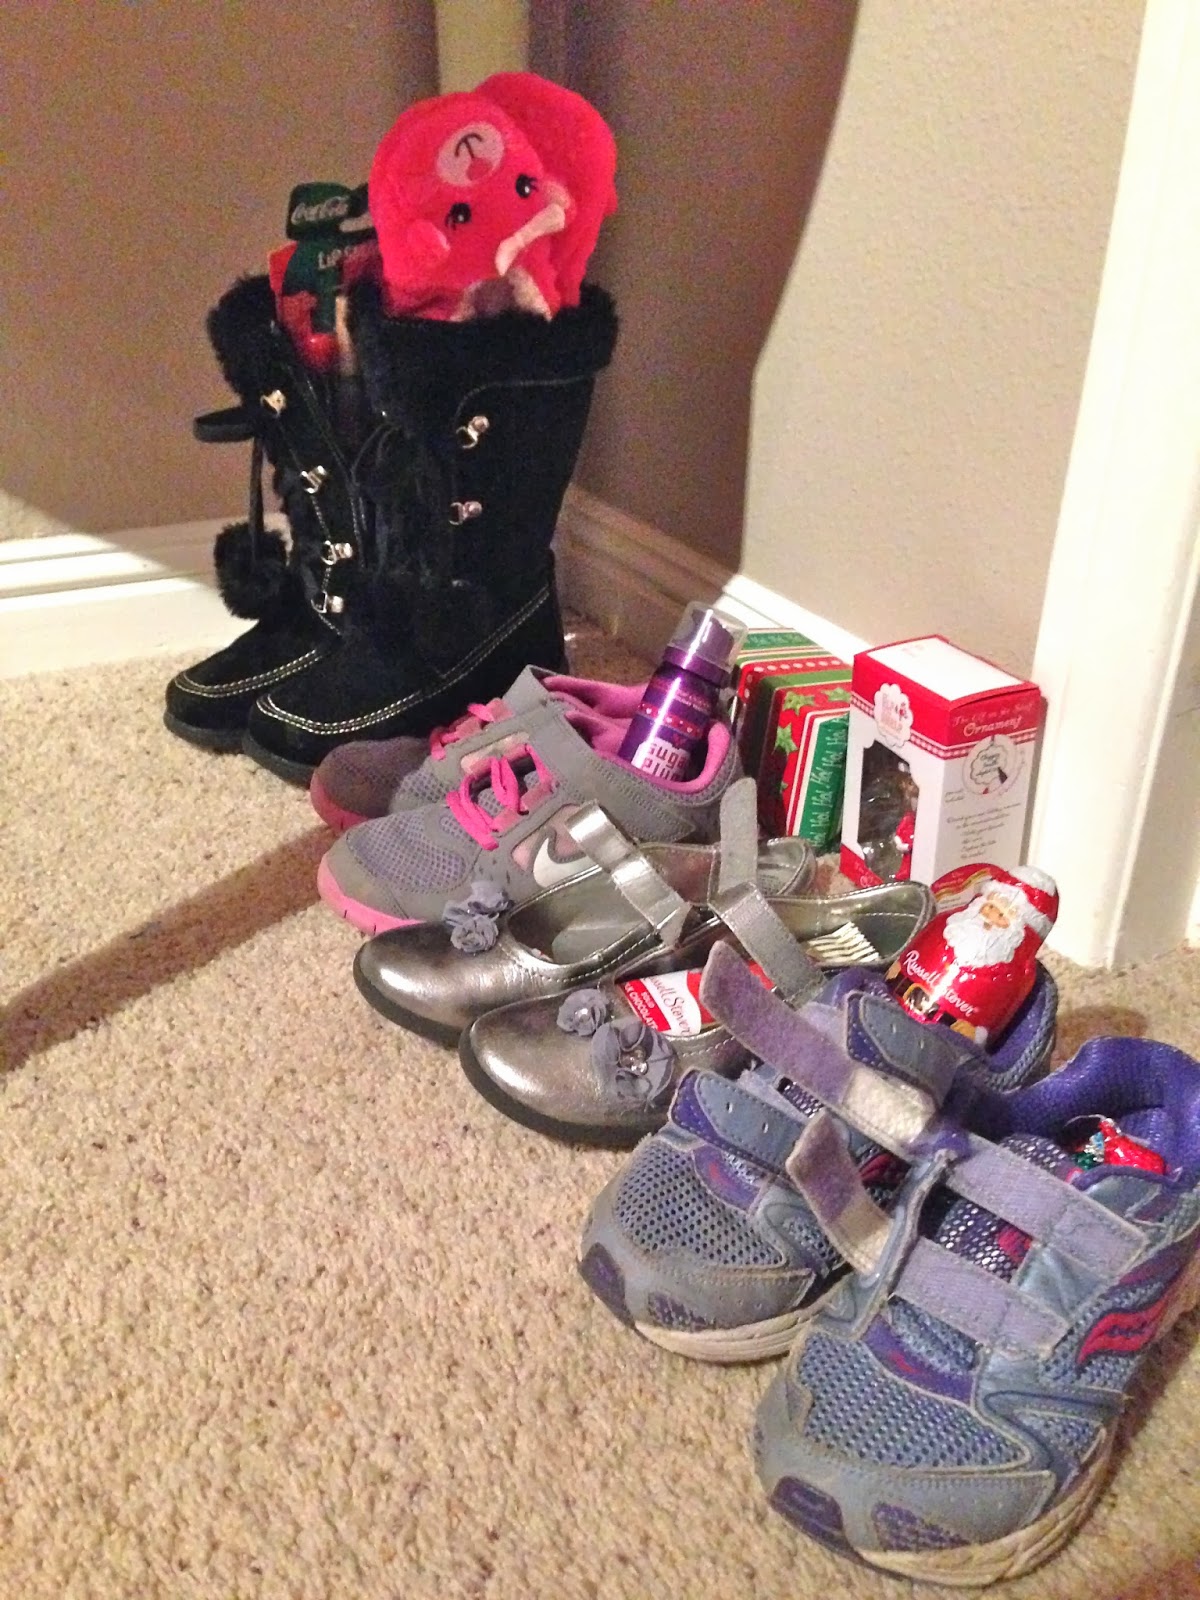
Ever since I was a little girl my family would celebrate St. Nicholas Day.  My parents always made the Christmas season seem magical.  I love this tradition because it gives the children something fun to look forward to.  On the night of December 5th, you set out your shoes and St. Nicholas comes and fills them with little treats, small gifts and a new ornament for the Christmas tree.  I love that every year my children get a new ornament for their own little tree.  When they are grown, they will have a box of ornaments from their childhood to help them remember Christmas past.  I love looking at my childhood ornaments, they bring back such wonderful memories.

I think traditionally you are only to put out 1 pair of shoes per person, my children like to get out lots of shoes - I guess that means more treats!


This is where we found Richie our Elf this morning.  It looks like he wanted in the fun too.  He found some American Girl Shoes and got his own little treats!


Amanda

Wednesday, December 4, 2013

Vintage Advent Calendar


I thought I would post a few pictures of my advent calendar.  It's a Christmas tradition that's been passed down since I was a little girl.  Growing up, my mom had a Coke crate in our entry way and would wrap little ornaments in tissue paper, just like this picture.  Every morning we would take turns opening one.  It's one of my favorite Christmas memories!!  Now my Children can't wait to unwrap an ornament each morning!  I have also included a little piece of paper with a scripture on it that we read and a candy cane.  


Amanda

Monday, December 2, 2013

Hip Holiday Retro Christmas Pillow

 I am so totally in love with this Hip Holiday line from Blend Fabric!  My favorite print is the retro cars with the christmas trees!  I had to make a throw pillow - surprising?  The tutorial is over on the Therm O Web Blog - check it out!

This pillow is featuring my new favorite way to finish a pillow - a zipper flap on the back!

Should I be concerned that I have a matching pink, white, green and aqua Christmas tree in my family room?

 So totally in love!

Amanda

Tuesday, November 19, 2013

Blue Jars, Bottle Brush Trees & Old Cars

These cute bottle brush trees in mason jars are everywhere in blog land!  I had to jump in and assemble a few for myself!  

My trees started out too green.  I sprayed a little Heirloom White spray paint on them and now they look like they've been lightly dusted with snow.


You can use fake snow for the snow, I used sugar.  Then place your little trees inside the jars.

I love vintage cars.  I didn't want to spend $$$ on a replica car.  I was thrilled when I found this one in the ornament section of Target for only $3!

I bought these smaller trees at Michael's in a package for about $1.  Use wire cutters to snip off the base.  Then place in your truck!

 I love it!!!  Makes me feel happy inside when I look at this nostalgic scene!


Amanda

Tuesday, November 12, 2013

Deer Friends, Christmas Deer Throw Pillow Tutorials

Do you like my new chairs?  I just ordered them from Amazon and they came in 2 days!  It was totally risky of me to just push a button and have chairs sent to my house, sight unseen!  But, I LOVE them!  They are exactly what I wanted and they are even comfortable!!!  The whole reason to buy new chairs is to sew new pillows, right?  I am obsessed with deer!  Deer throw pillows my chairs do need (a little Yoda verbiage!)

My friend and I got together and the children played and we sewed!!  An entire herd of deer throw pillows!


Here's how to make the appliqué deer pillow: My pillow form is a 20" square down pillow.  Down is a bit "squishy" so the pillows have a more casual feel. 

Appliqué Pattern, download HERE.  Print 2 of these and reverse one of the images.  The image is on 2 pages because it is larger than a piece of paper.

Print out the pattern and tape it together.  Trace the pattern onto Heat n Bond Lite fusible appliqué.  I used a wool blend fabric for the gray deer.  You can use any type of fabric.

Cut the chevron fabric 21"
Iron the deer to the center of the fabric and stitch around the deer.


I wanted a bit of an accent on the back of the pillow, so I put the zipper on the back with a decorative flap over the zipper....sounds hard but is super easy!!

To make the flap, cut your accent fabric 5" x 20" and press in half lengthwise.  
Cut your back pieces 4.5"x20" and 16"x20.
Lay them out like this with your zipper placed as so (NOT invisible zipper)
I promise I ironed my pieces!!
Layer the top piece of the pillow back, the folded flap, and the zipper so all the raw edges align, like this:
Using your zipper foot, sew along the zipper.  For the other side with out the flap, sew the backing fabric to the zipper just as you would normally sew in a zipper.  Press the flap down to cover the zipper - super easy!!! Pin the pillow front and back with right sides together.  Make sure to open zipper so you can turn it.  Sew a generous 1/4" seam around the entire pillow!


I couldn't just have 2 deer pillows - I needed more.  This one is super quick!  It is for a 18" pillow.


Cut the center deer fabric 10 1/2" x 19"
Cut the aqua snowflake fabric (2) 4 1/4" x 19"
Sew them in this order using 1/4" seams


 I had this pretty light gray lace I top-stitched over the seams.  Now, cut the back of your pillow 19" square and finish as desired.  I put an invisible zipper in the bottom.


Deer pillow #3 - this fabric doesn't exactly have deer on it, but it has antlers atop the Cuckoo clocks!  And it's teal!!!  Another quick pillow!!  This pillow form is 20" but it is pretty floppy, so I decided to cut my pillow cover at 20" so it would fit better.

Cut the teal print 15" x 20"
Cut the gray dot 5 1/2" x 20"
Sew using 1/4" seams
Cut the back piece 20" square.

Top stitch lace along seam.  Finish as desired - again another invisible zipper - those things are totally AWESOME!!!

Here are my friend's cute deer pillows - she used a bolder chevron and a brown deer on an 18" firm pillow.

I am so loving the zipper flap!

Sewing deer pillows makes me happy :)

Amanda